Showing posts with label watercolor. Show all posts

Wednesday, August 22, 2018

Bird Confetti


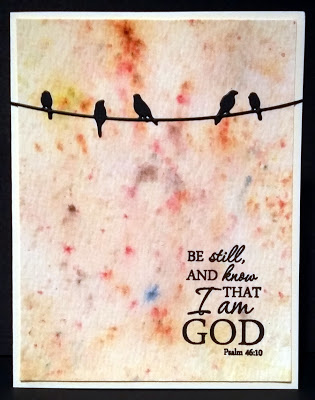
I have used "watercolor" paper before that was labeled as such, but then when you start applying water, the paper curls up, or the brush messes up the tooth of the paper. That's why I LOVE Tim Holtz's watercolor paper, because it holds up to all kinds of watercolor abuse! You can get the paper really soaked, but it will dry up nicely. And the paper is 2-sided, with good texture on one side, and smoother on the other. In my card above, you can see that I used the textured side.

The confetti-cake look of the background was achieved by squirting Ken Oliver's Color Burst powders onto the paper, and then misting them with water. I used a combination of yellow ochre, burnt orange, and sepia; however, each of these colors contains granules of other colors (for example green, mixed in with the yellow), which accounts for the spots of blues, purples and reds that you see.

I was so late to jump on the bandwagon of stamp platforms, that I ended up just kind of running along behind it. But when I finally got one -- the Tim Holtz/Tonic platform - I can see what all the fuss is about! Although I haven't had it long, I know it has saved some cards. In the case of this card, since I was stamping on texture, the first take, though pretty good, didn't come out as dark as I liked, so I just inked up the stamp and hit it again. Nice, rich color was my result.

I like the pairing of this verse with the birds, because they are showing us how it's done: to be still, and know that God is there -- the perfect example of trust!

Thanks for looking! Have a great Wednesday. :)

Supplies:
Stamps - Verve scripture stamp
Paper - Tim Holtz watercolor paper
Ink - Versafine onyx black
Dies - unbranded birds on a wire die
Accessories - Ken Oliver Color Burst powders
Monday, July 30, 2018

Purple Sympathy


I tried a different watercolor medium this week -- Ken Oliver's Color Burst powders. I've used the powders before to make beautiful abstract backgrounds, but this is the first time I used them with a brush to color "inside the lines." The colors are super vivid, and I found myself adding water and blotting to try to tone down the color a bit. It's amazing how far a few tiny flakes of powder could go! When I finished coloring the flowers ("Flower Fields" by Stampendous), I used the paintbrush "tap" technique to add sprinkles of color to the background. To do this, I got plenty of the color on the brush, held the brush firmly over the paper horizontally, and then tapped the handle of the brush with the index finger of my other hand, which allowed the color to be flung around a bit. I added the tag with the sentiment by Verve, and framed out my picture to complete it. This is an easy way to use some of those larger images, and is quick when you need a card to send out on short notice.

Thanks for stopping by! Have a great week!

Wednesday, July 11, 2018

Sailboat Peace


I played along with the Splitcoast "Clean and Simple" challenge #489, which was to make a "tropical" CAS card. If I went on a tropical vacation, I'd hope it would be like this "Beachfront Boat" stamp scene by Stampendous. Whether on that boat or on that beach, it looks so quiet and peaceful, I could think of no better sentiment! And because I will be using this in my card ministry, I paired the idea of peace with the inside scripture "Be still and know that I am God. - Psalm 46:10"

I'm also submitting this to the Dragonfly Journeys "Summer Lovin'" challenge. I'm sure everyone has some kind of summer stamps or dies, so link it up so we can see what YOU made! :)

Supplies:

Stamps - "Beachfront Boat" by Stampendous; "Holiday Word Borders" set by Hero Arts
Paper - "Aquarelle" (6 x 6 pad) by Love Nicole

Ink - Versafine onyx black; Ranger Distress Oxide inks for watercoloring
 

Monday, July 9, 2018

Watercolor Sympathy


Today's card features an old stand-by stamp set, "Close as a Memory" by Stampin' Up. This set is so old, it's wood-mounted! I've become so spoiled by clear stamps, I'm not used to the guessing game of stamping and hoping I've lined it up straight. But besides that, this set is a great go-to for sympathy cards, because it's kind of fool-proof with the flowers and the great sentiments.

I started with Tim Holtz's "speckled" stencil and rubbed distress oxide ink to get the random spots in the background. I also used the oxide ink to sponge around the edges. Next, I inked up the flower stamp using Tim Holtz distress markers, and spritzed the inked stamp with water before stamping it. The sentiment was stamped onto the "Classy Label" die by Verve, and popped up with dimensionals.

Here is the inside sentiment:


I love the wording of both of these sayings!

About my cardstock: Like many, my first introduction to stamping was through Stampin' Up!, back in 2001. At the time, I bought a lot of packs of their cardstock families, and inherited more when my sister retired as a demonstrator years later. Since then, SU has gone through so many "in colors" and have retired and replaced colors, but I still have my original stash. This blue cardstock is from SU, but I don't know the color, and even if I did, chances are good that it's either retired now or called something different. So please forgive me in the future for not giving the name of the color of cardstock, because frankly, other than a few of my favorite classic colors (old olive, eggplant envy, chocolate chip), the names really didn't register with me.

Have a great week!

Monday, July 2, 2018

Making Some Noise

REMINDER: Now thru July 8, enjoy 40% off ALL Hambo stamps! See our SALE page for details. 

Now on to today's card:


While on a stamp retreat years ago with some of my Hambo Stamps designers, I was privileged to receive a tutorial from card-maker extraordinaire Melissa Edwards. She is a master of coloring, but the technique she showed us was using markers on an acrylic block and spritzing to do easy water-colored backgrounds. I've since made dozens of cards (you can see some here and here) using her technique, because not only is it very easy to do, but the results are STUNNING. But we didn't merely lay down the watercolor -- she taught us to add "noise" to the color, which kicks it up a notch.

My card above demonstrates such "noise." Although this time I used a swatch of designer paper instead of using markers to make the water-colored strip, I still started with basic variations on a color:


Above is the paper I chose from Love Nicole's "Aquarelle" pad. I cut it down so that I just had purplish strip on the left. I could have left the strip as it was, glued my die cut on top and finished the card, but it would have looked a little more dull than it does with the added "noise." I started with a script background stamp, and stamped it in an ink that coordinated with the paper's design, but wasn't too dark. You want the noise to be there, but not stand out too much on its own. Next, I chose another coordinating color to stamp some leaves randomly over the script. The paper already had some white spots included in the design, so I was satisfied to stop there. You can see a close-up of the noise below:


With the paper now jazzed up, I was ready to glue it to my white card base, and add the "Prim Poppy" die cut. Finally, I finished the card with a scripture stamp from Verve. The noise adds just enough extra drama to help the die cut stand out a little more, and leads to a more interesting card.

Do you like to add noise? If you've never tried it, give it a shot, and feel free to link up your result in the comments below.

Happy stamping!

Supplies:

Stamps - scripture from "Scripture Medley 4" by Verve; script background by Recollections; leaves from "Fanciful Filaments" set by Hero Arts
Paper - "Aquarelle" (6 x 6 pad) by Love Nicole

Ink - Memento "Lilac Posies" for sentiment and leaves; "Sweet Plum" for script background

Dies - "Prim Poppy" by Memory Box 

Monday, June 25, 2018

Sunflowers


I mentioned last week that I found some great deals at Tuesday Morning; this Stampendous "Sunflower & Ladybug" stamp was one of them. The large cling stamp was $2.99, I believe. I love deals like that!
The image was water-colored with distress oxide inks, and then cropped with a Spellbinders oval die. The Hero Arts sentiment finishes it off.

Have a great week!

Monday, May 21, 2018

Stencil 2 Ways

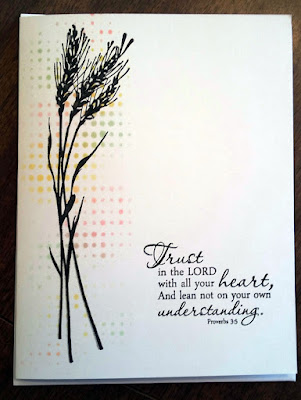
I have two cards for you today, both using the same "Dot Fade" stencil by Tim Holtz, but in a yin/yang kind of way. For the first card, I used different colors of Ranger oxide inks to color over the stencil, until I had a random pattern of colored dots. Over this, I stamped wheat stalks from Inkadinkado's "Meadow" set, and finally added the Proverbs 3:5 scripture stamp from "Scripture Medley 1" by Verve. This resulted in a very quick one layer card which will be perfect for my card ministry, in that it can be sent for any occasion.


As I began to clean up, I noticed that I still had quite of bit of oxide ink residue left on the stencil. Instead of wiping it off, I misted it up, turned the stencil over, and positioned it on a new white card base. Because the oxide ink reacts with water, I ended up with a beautiful water-colored design.


This time I used a Memory Box "Prim Poppy" die cut over the colors, and stamped a sentiment from Penny Black's "Faith" clear set. And just like that, two super simple, minutes-to-make cards!